Wood grain is often the main attraction of stain-grade and clear-finished woodwork, yet I’m surprised how often I see new trim that has been installed without any consideration for the grain patterns in the wood. A little time and attention paid to wood grain can vastly improve the look.
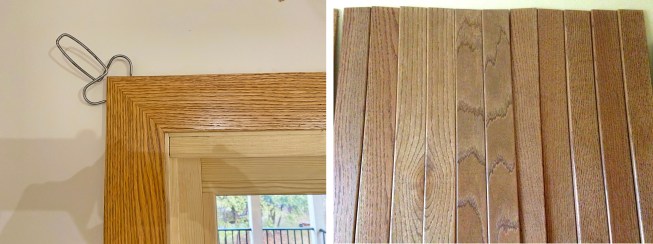
The author typically aligns the grain on miters for stain-grade work (left). He spends a little time sorting boards into pairs by grain type (right) to make it easier to match the grain prior to cutting the miters.
For example, I always take a little time to align grain patterns when mitering casing around a window or door opening (see photos above). It helps to spend some extra time sorting boards by grain style in matched pairs for casing. Working with matched grain, it only takes a few minutes more to slide the boards past each other to find the best match (see photos below). It’s even faster if you are cutting the head and the side casing from the same board. Matching the grain at a miter means you end up with a little more waste. But the difference, once you see it, is immense. When the grain is aligned, a miter all but disappears; you see the grain turn direction but you aren’t necessarily aware of the joint. Whereas, when the grain doesn’t align, the miter disrupts the grain patterns and the board’s cut ends stand out.
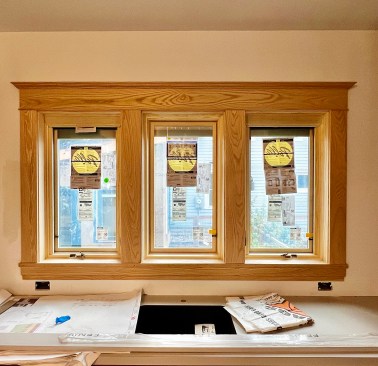
To match the grain at a miter, The author cuts one side of a miter and slides it across the face of the joining board (as shown on left) to find where the latewood grain lines match the best. The result is shown above at right.
Earlywood vs latewood. The pronounced grain patterns on a board are typically formed by the combination of light-colored earlywood (formed early in the tree’s annual growing season) and darker-colored latewood (formed in late summer and autumn). Each pair of early and late wood represents one year of a tree’s growth and forms the “annual rings” in a log. When that log gets sliced up at a mill, what we see as rings at the end of a log turn into grain patterns that vary by how a board is cut.
Plainsawn patterns. Most of the time, boards will be “plain sawn,” which produces “flat grain” with distinctive cathedral or flame patterns on the face of most boards. These patterns vary widely and yield an inconsistent pattern, particularly on boards cut closer to the outside of the log where the growth rings of the tree run parallel, or close to parallel, to the face of the boards. Plainsawing is the most common method of milling lumber because it produces the least waste. But because the grain runs parallel to the face of most boards, those boards are more likely to cup or warp.
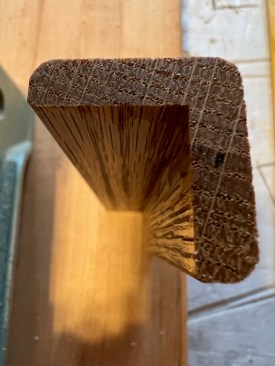
While the flamelike patterns on plainsawn boards vary widely and are inconsistent, the shapes can be positioned to create some sense of visual harmony. With stain-grade casing, for example, I center shapes in the grain pattern on the headers of windows and doors whenever possible (see photo below). Quartersawn and riftsawn boards tend to have “vertical grain” that runs parallel to the edges of the board and the grain pattern on the face of boards appears as alternating stripes of earlywood and latewood. Vertical grain tends to warp much less because the bands of early and later wood, which absorb moisture at different rates, are consistent, so a board tends to shrink and swell evenly.
While it creates a little more waste when casing a window, centering the grain figure over the window yields a balanced composition in the grain of this stain-grade oak trim.
One important detail to think about if you’re installing a backband around window and door casings: A lot of the time, we create the look of a traditional backband with a corner molding. One leg of the corner molding will have flat grain and one leg will have vertical grain. Most importantly, pay attention to this difference and be consistent in where you place the vertical or flat grain on the face casing. You probably don’t want the flat-grain face of a corner molding meeting a vertical grain face at the miter.
One leg of any corner molding will have flat grain (in this example, it’s the horizontal leg on top), and the other leg will have vertical grain
Consistency rules. Also, because the side with vertical grain will move evenly with changes in moisture content, it’s better to cut the miter on this face of the corner molding. With something as small as a corner molding this doesn’t tend to make a huge difference. But it’s worth noting and getting into the habit of thinking about how the grain will move, remembering that miters in flat grain are more likely to open than miters in vertical-grain wood.
Sapwood and heartwood. Tree logs also have sapwood made of living cells that grow closer to the outer circumference of the tree. Sapwood cells convey water from the roots up the tree. As the tree grows, these sapwood cells die, turning to heartwood that forms the dense, structural core of a tree. The variation in color between lighter sapwood and darker heartwood is also visible when the log gets sliced up.
This difference can also be exploited for visual interest. One example is the casing I installed for some custom interior doors and windows (see photo below at left). The doors and casing are made of yellow birch. Hardwood suppliers will sell either “yellow birch” or “red birch” or “white birch,” but it’s all the same species. But while red birch is mostly heartwood and white birch is mostly sapwood, yellow birch (what we have here) is a mix of sapwood and heartwood. We were going for a wild look that in many ways is the opposite of grain matching, but it was done with intention. The high contrast between the sapwood and heartwood of yellow birch was fun to play with on this job.
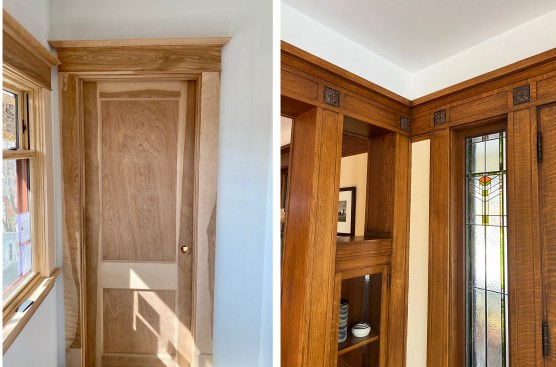
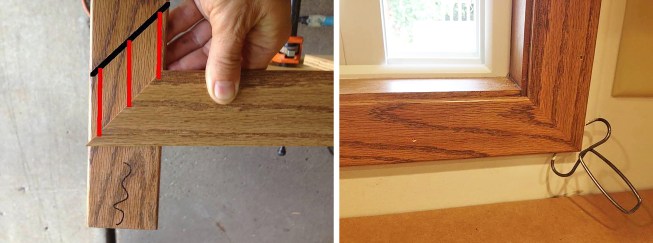
To case around custom birch doors, the author used yellow birch with a mix of sapwood and heartwood, going for a “wild” look as requested by the client (left). The ray fleck visible in quartersawn oak (most prominent on the casing and door on the right) is often called “tiger stripes” (right).
Figure in wood. Along with variations in early and latewood, and in sapwood and heartwood, different cell configurations in different wood species along with the growing stresses that change the shape and configuration of wood cells produce all kinds of variation in wood grain patterns. A common one is the ray fleck in quartersawn oak, which is formed when radial cell bands that transport nutrients through the tree are exposed on the surface of a quartersawn board. Sometimes called “tiger stripes,” ray fleck appears as wavy ribbons that reflect the light differently than the rest of the board’s surface. The ray fleck in photo 9 is especially noticeable in the casing near the hinges and on the door.
Variations such as these in the appearance of wood grain are often called “figure” in wood. Paying attention to wood grain and intentionally selecting and positioning boards to highlight wood figure becomes one of the more fun aspects of finish carpentry, I think. I always make a point to show clients how I have intentionally aligned the grain and positioned the figure. Those who already have a feel for figure in wood appreciate the work more, and those who learn about it for the first time suddenly take a keen interest in it throughout their home; it becomes a topic of conversation and another point of pride they feel for their new or newly renovated home.