A big part of a trim carpenter’s job is problem solving. A lot of DIY carpenters don’t do this well, as evidenced when JLC editor Clayton DeKorne moved into a new house last April. The previous homeowner had opted to finish the house himself with the very least expensive materials. He did marginally OK with ordinary casing and baseboard but left eyesores wherever floor height changed or moldings needed to terminate or change level, and .
What follows are a series of photos Clay took in the house, along with photos I took in my shop after I dummied up scrap material to demonstrate the joints I would have used to resolve these transitions on one of my jobs. For some of these, I used a simple door stop to mimic the existing trim. But in other cases, the only scrap I had was leftover custom or salvaged trim, which is commentary in itself.
Modern trim hasn’t done us any favors. Home centers and big box stores are full of wood, near wood, and plastic trim stock with shallow profiles. Good luck finding crown wider than 3 5/8 inches. Stock chair rail is 2 3/4 inches wide or less and rarely projects more than 3/4 inch off the wall. There’s little sense of proportion in the ogees, coves, and beads that the new trim resembles. Of course, these shallow moldings are less expensive than solid, clear wood milled with deep profiles. But with care and skill, you can still produce handsome trim jobs using stock moldings. Good work doesn’t have to look cheap.
Floor Changes
1
of 2
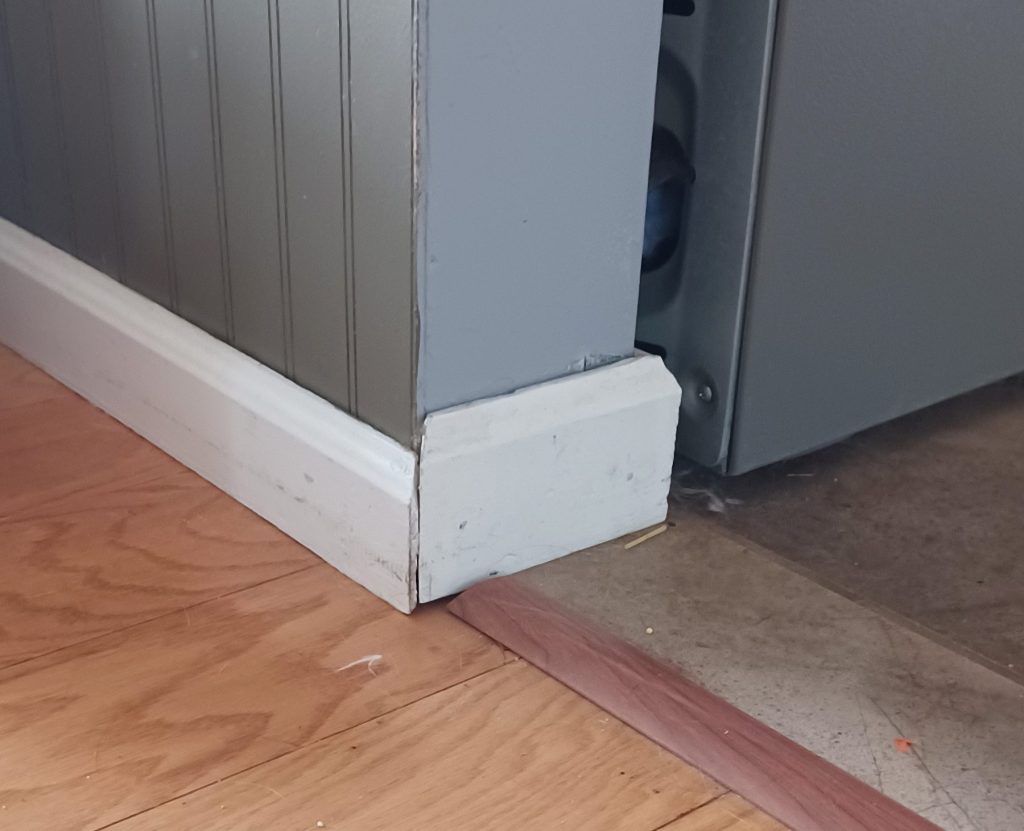
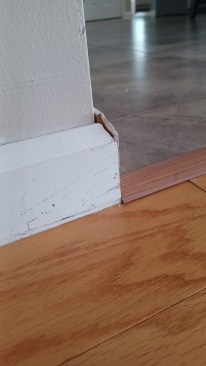
This is one of the more egregious errors. The homeowner made no …
This is one of the more egregious errors. The homeowner made no attempt whatsoever to resolve the change in floor height. This occurred at every entrance to the kitchen (three of them), where the tile floor was 1/4 to 3/8 inch higher than the wood flooring.
With a shoe molding, you could cheat the elevation of the baseboard over the wood flooring to accommodate the change in floor height. The gap at the bottom of the baseboard would be covered by the shoe molding.
Brian Campbell
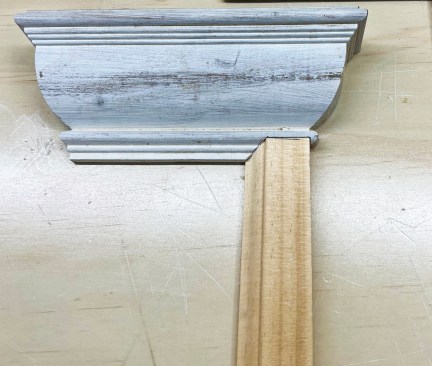
When I encounter this type of change in elevation, I prefer to …
When I encounter this type of change in elevation, I prefer to miter the profiled edge, so it creates a step. The small vertical piece then gets a reverse miter to return to horizontal. This results in a little parallelogram, with the short side equal to the change in floor height. The difference in floor thickness equals the drop at the top of baseboard. (Note: In my mockup above, the darker area on the bottom of the stepped baseboard represents the tile floor.)
I often encounter these steps in elevation with more elaborate base-cap and chair-rail moldings that wrap the outside wall corners on stairs, where this type of transition works well.
Molding Termination
1
of 3
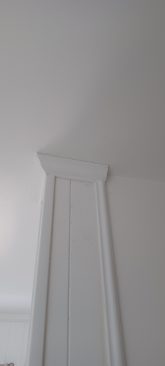
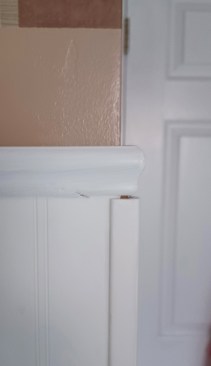
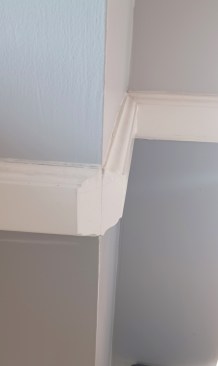
Any molding, such as this crown that ends where paneling in a ba…
Any molding, such as this crown that ends where paneling in a bathroom meets the shower, can be returned to the wall by cutting an outside miter. The small return piece then dies into the wall, covering the void behind the crown.
Brian Campbell
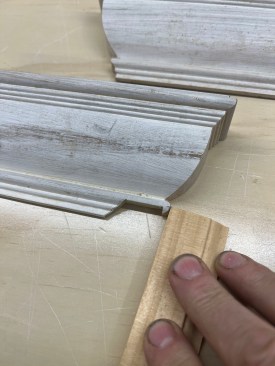
I cut in the vertical molding where its thickness matches the t…
I cut in the vertical molding where its thickness matches the thickness on the bottom profile of the crown.
Brian Campbell
By matching the thickness, the joining pieces will blend togethe…
By matching the thickness, the joining pieces will blend together seamlessly when painted.
Head Casing Options
1
of 2
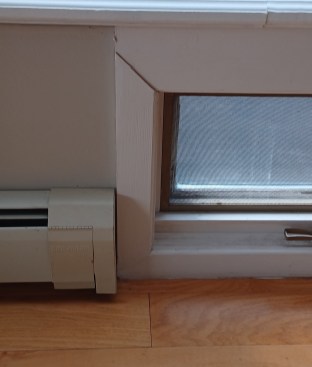
The simplest solution for casing this floor-level window would h…
The simplest solution for casing this floor-level window would have been to use casing of the same width for the head and the sides. This would leave a small area of wall between the head casing and the window sill above. Yes, it’s a fussy detail with respect to finishing the drywall and painting, but those are the type of interior details that look quite elegant.
Brian Campbell
Even if you wanted to avoid this fussy work and fill in the spac…
Even if you wanted to avoid this fussy work and fill in the space with wood, the joint would look better cut square with the side casings butted underneath, either with an overhang or cut flush to the side casing. This is the correct way to case any window or door using square-edged trim. It mimics a post-and-beam connection, and it looks right because it looks structurally sound.
Panel Corners
1
of 4
Flimsy MDF paneling is tough to finish at an outside corner with…
Flimsy MDF paneling is tough to finish at an outside corner without corner molding. A larger chair rail (one that projected further from the wall) would provide a large enough surface for the corner molding to die into. At the very least, this chair rail should have been packed out about 1/4 inch to give the corner molding something to butt into.
Brian Campbell
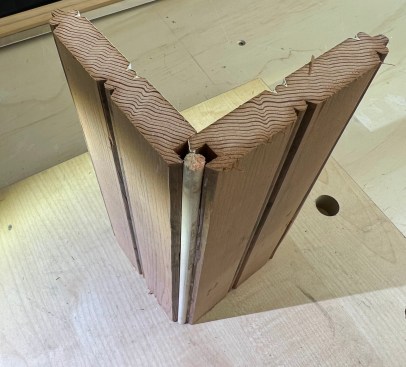
For one of my jobs, I would have used solid-wood bead board for …
For one of my jobs, I would have used solid-wood bead board for the wainscot to achieve this look. The best way I’ve found to finish the outside corners of beadboard is with a dowel.
Brian Campbell
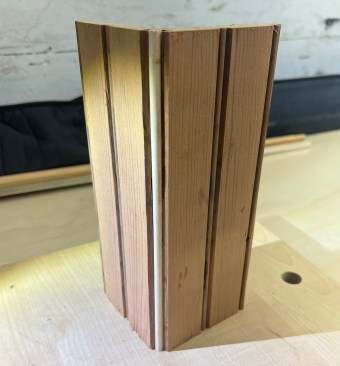
Viewed from the front, the transition at the corner is clean and…
Viewed from the front, the transition at the corner is clean and does not protrude past the paneling.
Clearly, cove molding makes for a cumbersome finish at inside co…
Clearly, cove molding makes for a cumbersome finish at inside corners, particularly where it meets a small chair rail. Ideally, the inside corners of the paneling should have been butted together with no molding on the inside corners. Granted, this cheap grooved paneling can be hard to join cleanly if the walls aren’t smooth and square. If I had to use a molding to clean up the joint, I would have just used a small quarter round.
Gentle Outside Corner
1
of 2
I can understand wanting to cut a gentler outside corner, partic…
I can understand wanting to cut a gentler outside corner, particularly for an outside corner where someone might run into it. The finished result should not look like this though.
Brian Campbell
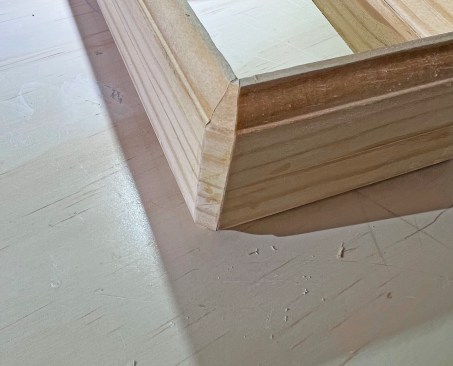
In such a case, I cut a couple of 22.5-degree miters, and use a …
In such a case, I cut a couple of 22.5-degree miters, and use a small infill corner to maintain the molding profile wrapping around the corner, as shown in the photo. For assembling a small piece like this, many carpenters will use a cyanoacrylate glue, such as FastCap 2P-10, which sets up quickly and will hold the piece in place for assembly. But 2P-10 isn’t a good long-term solution and can fail if the corner gets banged in the future. I will use 2P-10 for the assembly, along with wood glue for a more durable bond. I would also prefer a few brads in the joint to provide a strong mechanical connection.
Stair Transitions
1
of 3
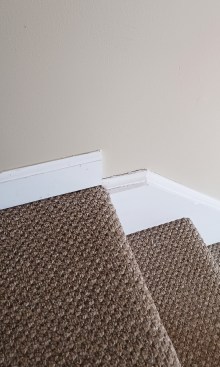
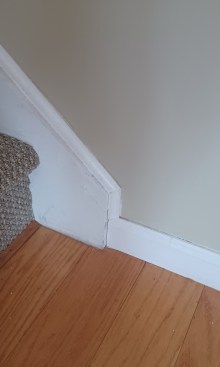
This is an especially terrible stair-to-base transition. The bes…
This is an especially terrible stair-to-base transition. The best solution is to extend the stair skirt up to the top of the baseboard and bisect the angle.
Here the stair trim dies into the floor and does not carry into …
Here the stair trim dies into the floor and does not carry into the baseboard int he room.
Brian Campbell
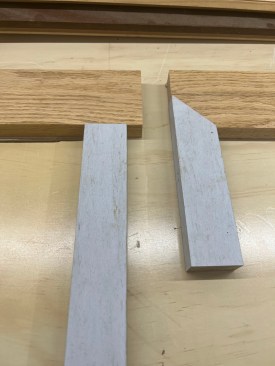
Ideally, the skirt and the baseboard are the same thickness and …
Ideally, the skirt and the baseboard are the same thickness and have the same molding profile. Sometimes with manufactured stairs, you don’t have the chance to extend the skirt to the baseboard height. If this were the case, I would cut a triangle to infill the skirt and pack out the baseboard to match the skirt thickness.
Keep the conversation going—sign up to our newsletter for exclusive content and updates.Sign up for free