I am not a cabinet maker. I’ve always considered myself an all-around carpenter, and I take on all kinds of different jobs. My shop is the client’s driveway or garage; for the job in this story, it was under the client’s deck. With those limitations, I regularly provide cost-conscious custom work to my clients. On this job, the client wanted shelving for their many books in an unused space in their basement.
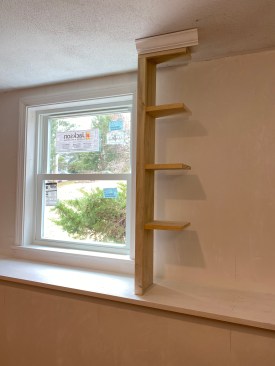
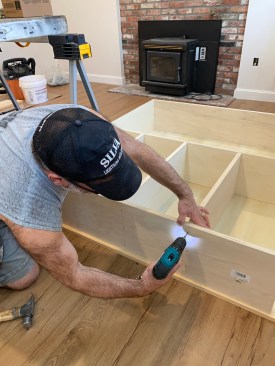
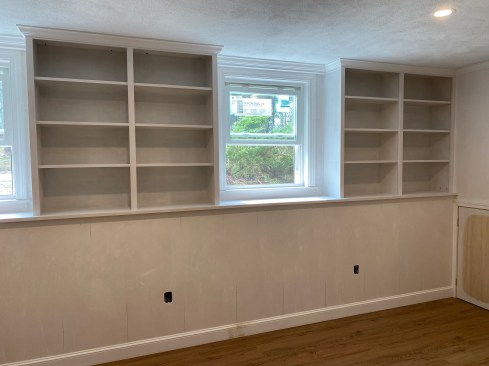
The space was a bump-out on the wall between two windows. As we went over options for height and depth, we narrowed it down to fixed shelves spaced at about 12 inches. To help her visualize it, I made a mockup that fit the space and put it where the finished bookcases would go. While this took extra time on my part, the client was able to set some books in the mockup and otherwise be sure it was what she wanted. It also gave me a plan to work from as I built the project. The client wanted the look of fixed shelves, so that spacing had to be right on.
Emanuel Silva
The author built a mock up to show the homeowner how the shelvin…
Building the Shelves
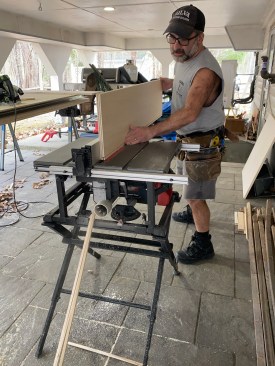
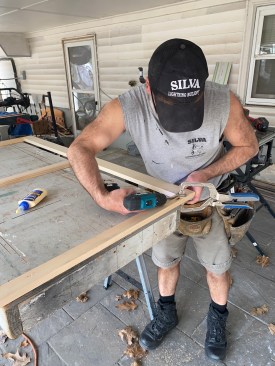
For the shelves and boxes, my first thought was to use ¾-inch Baltic birch multi-ply. What I found was that the price had gone up and availability was a problem. I was able to find a ¾-inch poplar multi-ply that would give me the strength I needed and would fit the budget. I’d use ½-inch poplar plywood for the backs of the shelving units and clear pine that I cut to fit to face the front edges. For the face frames of each unit, I ripped poplar 1×4 to the widths needed.
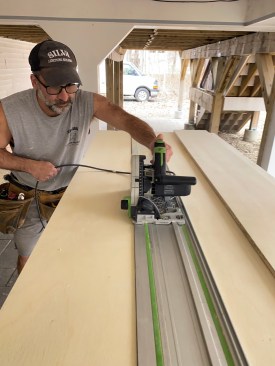
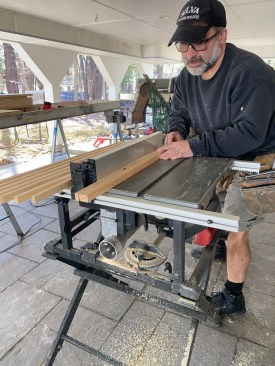
Working outside, I cut down the plywood with a track saw to the sizes needed. I then cut a dado in the back edge of the bookshelf frames to recess the ½-inch plywood back into. I cut all the shelves to size and banded the front of each shelf with strips of pine, fastening them with glue and 18-gauge brad nails. I also sanded all the parts before I went inside to start assembling them.
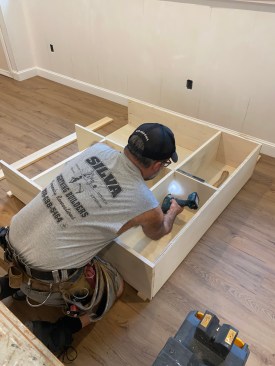
With all the parts cut, I moved into the basement to assemble the boxes. The frames of each box were glued, nailed, predrilled, and then screwed together. I glued and nailed the back in place, double-checking for square as I went. I then marked the oversized shelves to exact finished width and took them outside to cut. Screws driven through predrilled holes fastened each shelf in place to the sides of the boxes. Carefully running those screws through the middle of shelves prevented blow out or bulging in the plywood. I also attached each shelf from the back with screws. Having seen the books that the client wanted to store, I wanted to be sure the shelves would not bend.

Emanuel Silva
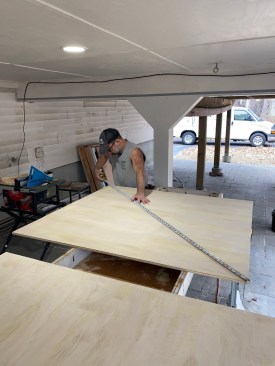
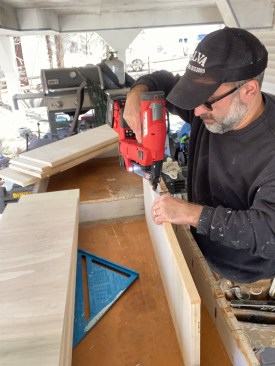
All parts of the project are sanded outside before being brought…
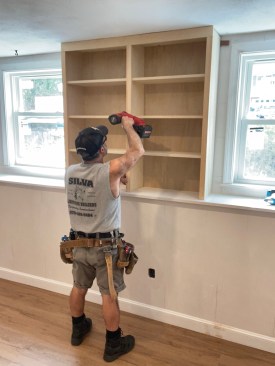
For the second set of shelves, I used pocket screws to attach them to the center divider, as I couldn’t go straight through the divider because of the first set of shelves. Next, I placed each shelving unit onto an existing window ledge in the basement and screwed the units to it with pocket screws. I then screwed the units to the back wall through the ½-inch plywood backer.
The face frames were next. Having cut the pieces, I glued and pocket-screwed these together outside before bringing them indoors. Each frame attached to the fronts of the bookshelves with glue and nails. Now, I could tie these units in with the rest of the basement.
Finishing Up
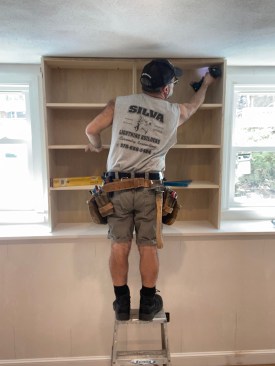
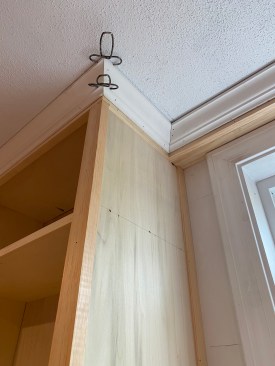
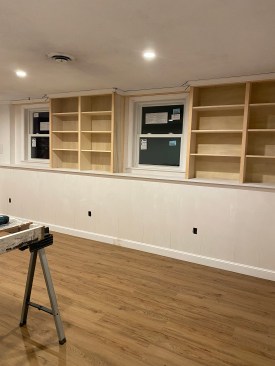
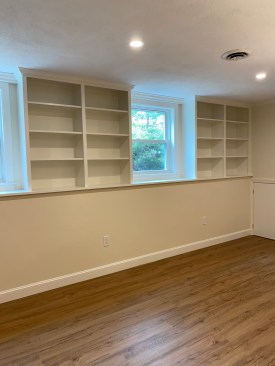
I built a valance above each window that matched what I had done in the rest of the room. Everywhere else, the valance was used for a wiring chase, while above the windows, the valance was decorative and provided a reveal for the crown. I ran the same crown molding that was in the rest of the basement onto the shelving units and above the windows.
I don’t usually do the finish painting, and, for this job, the client had a painter lined up who did a good job. Still, since it’s my name on the job more than the painter’s, I like to do all the prep work myself.
Emanuel Silva
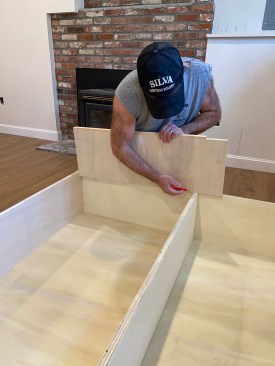
The frames that are to cover the fronts of the shelving units ar…
With all the parts already sanded, I went over the screw holes with a sharp putty knife to remove any burrs. Then I applied a coat of primer, caulking, nail-hole filling, and a first coat of Red Devil One Time in the larger screw holes. After the One Time dried, I applied a second coat followed by a light sand and one last coat of primer. This might seem like a lot of work, but this way I can control what the finished job will look like no matter who does the final painting.
When the client first talked about wanting built-in shelves like her daughter had in her house, she thought a cabinet shop would have to be involved. She figured that would be more than she could afford, though. I told her that this was something I could do on site that would be custom fit but would also fit her budget. I turned out to be right on both counts and left her impressed with the results. I like projects like this where I get to be creative, solve a problem (storage in an otherwise dead space), and leave with a happy client. It’s why I love what I do.
Keep the conversation going—sign up to our newsletter for exclusive content and updates. Sign up for free