
For most of the work I do, I must be creative in finding ways to make my projects easier and more profitable. Buying specialty tools and jigs can be helpful but expensive, so sometimes constructing my own makes more sense. That was the case about 12 years ago when I wrote “Drying Rack for Staining Shingles,” 6/14. For that project, I bought natural cedar shingles and stained them myself—which required a place to store them as they dried. I made that rack for that specific project only and disposed of it when the project was done.
Fast forward 12 years and I found myself once again needing a rack for drying stained shingles. This time I did a little more planning based on past experience. I built this rack so it can hold two and a half boxes of wood shingles, is lightweight, transportable by one person, and easy to fit in my box truck and store on job sites. It’s also inexpensive and can be built in a few hours.
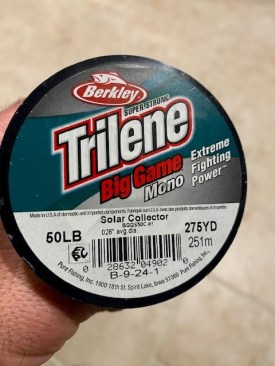
lf I had purchased the materials, the rack would have cost about $100, but by using scraps from past jobs it cost me nothing but my time. I decided that 4 feet wide by 5 feet high by 9 inches deep was the size that would work for all my needs. From a few previous jobs, I was able to gather up all the materials needed: ³/₄-inch primed birch plywood and 1-by primed stock. I also used fishing line supplied by the homeowner.
Building the Frame
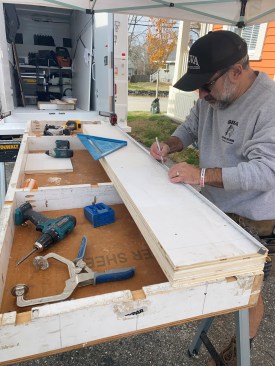
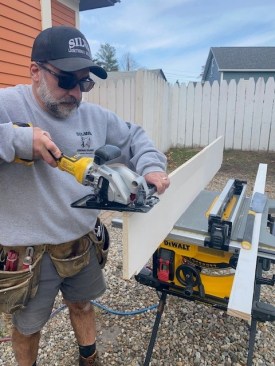
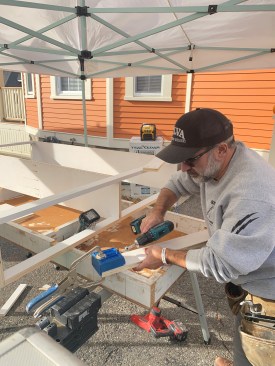
Starting with the side verticals, I ripped them down to 9 inches wide. To make the middle vertical, I needed to piece it together with glue and pocket screws and then rip it down to 9 inches. Screwing the verticals together let me cut them as one, making them the same length. While still screwed as one, I measured 2 inches from both ends and then ran my tape measure along the edge, marking 1-inch increments, giving me the proper clearance for each row.
Emanuel Silva
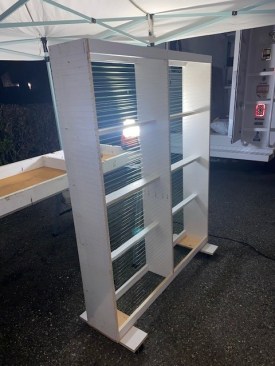
The author marks out notch spacing on all three verticals at the…
After that, I fastened them as one to the side of my portable worktable (“Two-in-One Worktable,” 1/24) with a few screws. Using my speed square and a small cordless trim saw I made ¹/₄-inch-deep saw kerfs at every mark across the edge of all the boards and did the same on the opposite edge. These saw kerfs are where the fishing line sits to make each row. To keep all the verticals in order, I labeled each piece. Then I ripped and crosscut four horizontals at 2 inches wide by 46 ¹/₂ inches long and screwed them with 2-inch trim screws to both side verticals, creating the boxed frame.
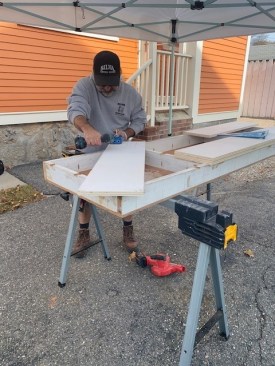
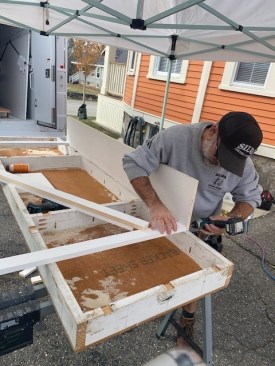
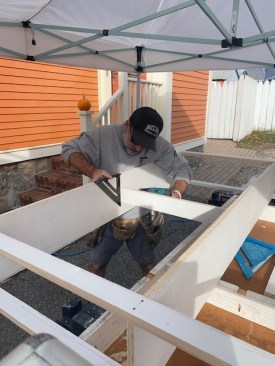
For the middle vertical, I notched both ends, top and bottom, and screwed it to the top and bottom horizontals.
In order to keep the frame from bowing due to the fishing line tension, I needed to add two horizontal pieces to the middle of the frame between the verticals. After ripping them to 3 inches wide and crosscutting them to the length needed between the verticals I pocket-screwed both ends and secured them between the verticals.
Emanuel Silva
The middle vertical is centered and secured to the top and botto…
Making It Mobile
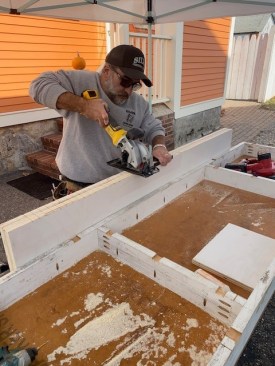
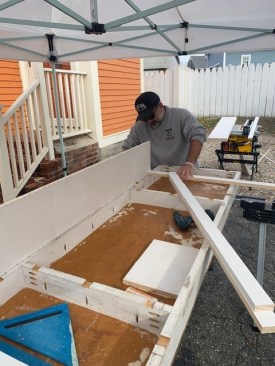
Next, I needed to make the rack mobile enough to move to and around job sites. It also needed to be stable enough to keep from tipping over because of its narrow depth. Attaching outrigger boards to the bottom of the rack, cut from scraps to the size of 6 inches wide by 16 inches long, made the rack very stable. Before attaching the outriggers, I added a scrap piece of ³/₄-inch plywood (9 inches by 9 inches) to the bottom corners of the rack to help give more fastening surface. I screwed the outrigger boards to the bottom of the rack through the plywood boards with 1 ¹/₂-inch construction screws.
Fishing Line Shelves
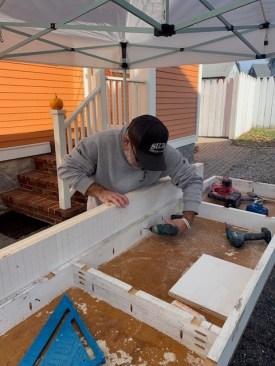
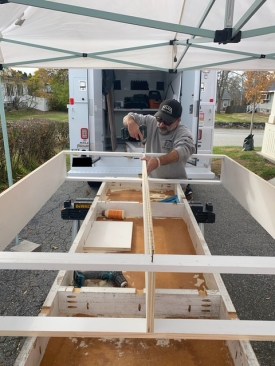
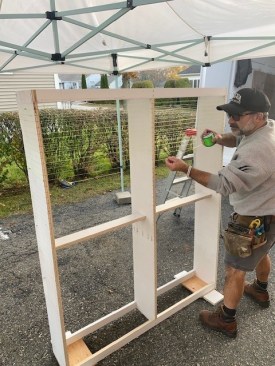
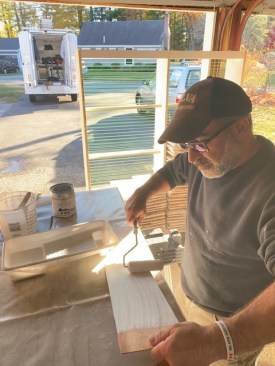
The toughest and longest part of the job was running fishing line around the rack for “shelves.” I used a 50-pound solar green (neon green) fishing line that is easier to see than clear line when placing the shingles in the rack. It took about an hour to feed the line into the kerf cuts and then wrap it around the ends and back. I attached a stainless-steel screw along the outside of the rack every 12 inches, leaving them proud enough to tie off the fishing line. Having a screw set at every 12 inches makes it easier to install and, most of all, easier to replace if a string breaks—you can replace that one section only, not the whole rack.
Starting with the top screw, I then tied off the fishing line and ran it around the rack with just enough tension to not snap it. After tying off the first line to the next screw I repeated the process until I reached the bottom. About halfway through the process I noticed there was some minor bowing along the top section. This required more horizontal bracing between the verticals. I cut and installed two braces to the top section and to the bottom sections. Once the installation of the fishing line was complete, I stood back to see that the frame was still straight.
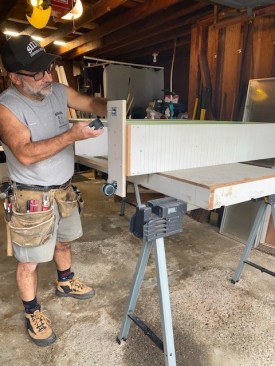
The last thing to do was install the four rubber caster wheels, which were also left over from a previous job. I secured the metal base plates to the outriggers and snapped in the wheels. For the weight and what this rack is used for, these wheels have worked great.

Emanuel Silva
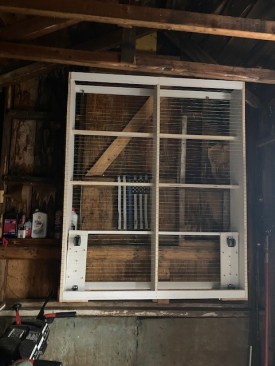
With the rack strung it is ready for its intended use. The spaci…
How It Performs
So what do I think of this drying rack? There are so many good points, but I’ll just mention a few. The rack helps keep all the shingles contained in one area, rather than scattered all around the job site. Keeping the rack closer to the worktable where I’m applying stain or paint saves me from moving around so much (time is money). With all those rows of line I’m able to place hundreds of shingles on very thin surfaces, which helps dry an entire shingle without marring up the surface. One thing that I will change in the future is this: Instead of using screws to attach and detach the outriggers when transporting, I will replace them with bolts and wing nuts. This will help prevent damage to the wood and make it faster and easier to change over. I look forward to using this rack for years to come—I just wish I’d built it earlier.
Keep the conversation going—sign up to our newsletter for exclusive content and updates. Sign up for free